
How to Change Customer's Price Plan
Introduction
This Playbook will cover how to change a customer’s price plan in Metronome. These are generally requested to Support from the Sales team in the #account-change-requests-and-refunds Slack channel.
These changes will take effect immediately.
Procedures
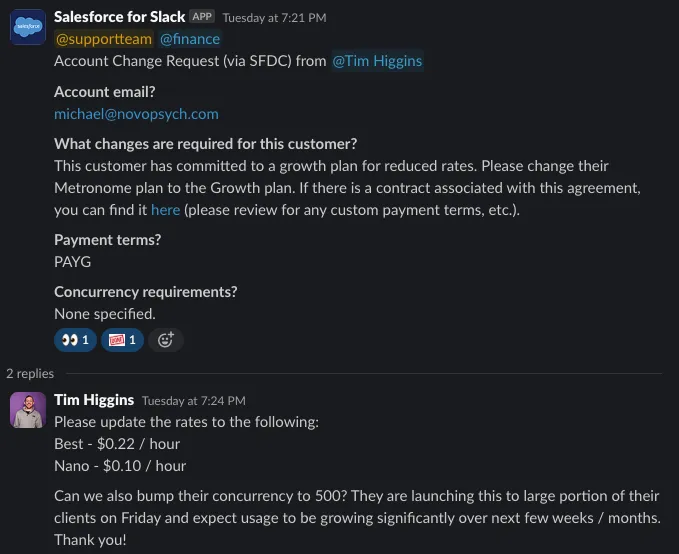
A standard plan change request will look like this:
When you are taking action, use the 👀 emoji to show this. Once this is actioned, please check it off by adding the  emoji and tag the requester in the comments with a message letting them know that this task is completed.
There are a few things to note about the request before you begin to process it:
-
Which specific plan is the customer being moved to? In the above example, the request is to move the customer to the Growth plan.
-
Are there any price adjustments? If yes, like in the example above, then this will require a Custom Growth PAYG plan. If not, then this would have been a Growth PAYG plan. Price adjustments are typically listed in the comments of the request, so always make sure to check there. There will also be a mention if these price changes are just for the US (NA) prices or also for the EU prices. Note: ANY price adjustment is a custom plan and never a default plan.
-
Are there any other additional requests? In the above case, there is a request to increase async concurrency. This is a separate process the instructions for which can be found in the Retool playbook under the section “Adjust a Customer’s Concurrency”.
To begin, first look up the customer’s account in Metronome. Then scroll to the Contracts & Plans section.

Before adding a new plan, you will need to end the current one. To do so, click on the active plan. This will take you to the Plan Overview page. From there, click on the gear icon in the upper right hand corner and select End Plan.

You will then be asked when this plan should end, make sure you set it to the day before the new plan should take effect. You cannot set a new plan to begin on the same day that an old plan ends.
Once the current plan is ended, you can now create a new plan. Back on the main account page in the Contracts & Plans section, click on the +Add button and then select Plan.
You will then be prompted to confirm that you would like to add a plan to this account. Once you click Add a Plan, you will then be taken to the page where you will select the specific plan.
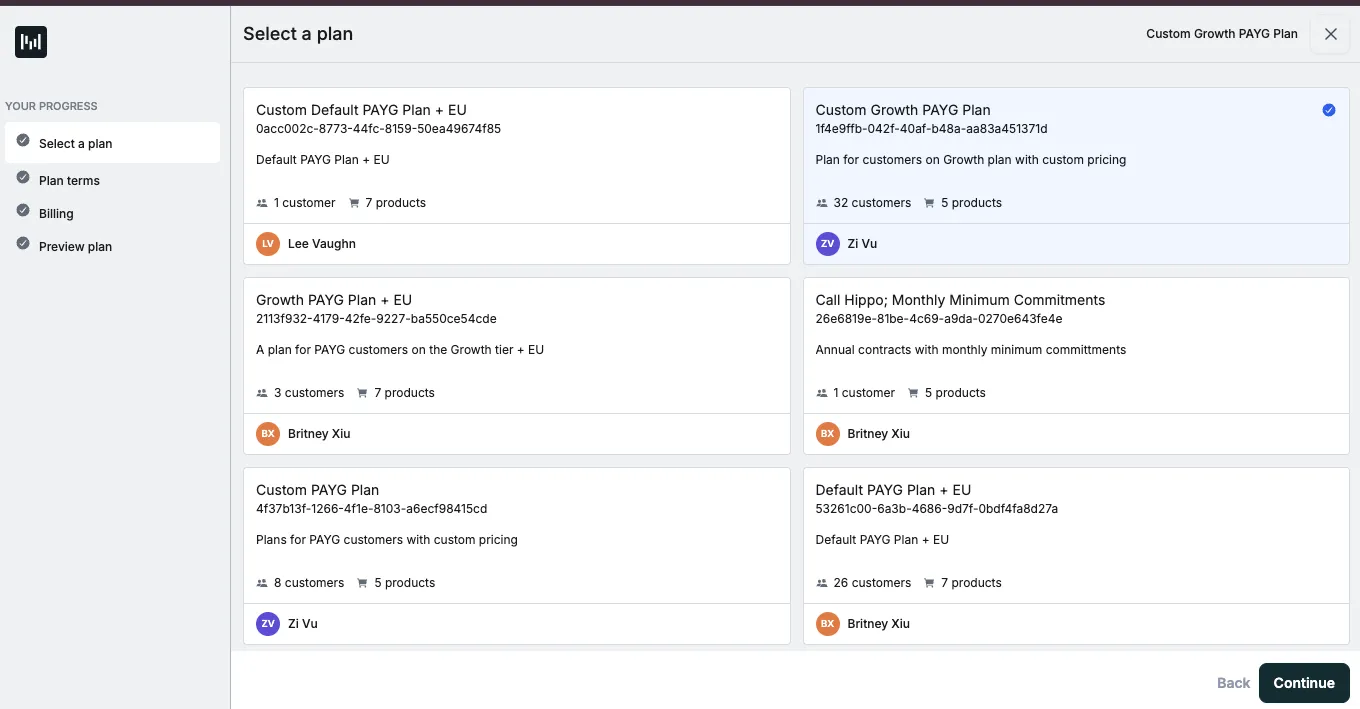
Once the plan is selected, hit Continue.
You will then see a preview of the selected plan. Hit Continue.
On the next page you will be prompted to give a start and end date for the contract. Unless otherwise stated in the request or the customer is on monthly invoicing, the start date should be set to the current date and for the end date make sure to check the box that says No End Date (perpetual plan). If the customer is receiving monthly invoices, set the end date back to the first of the month.
As a note, in most cases there won’t be an end date for a contract. If you forgot to end the current plan, you will see an error like in the screenshot below. If this is the case, you can just exit out of this plan wizard, end the current plan, and start again.
If there are price adjustments that need to be made, like in this case, toggle Apply Price Adjustments to on (see below screenshot). Then hit Continue.

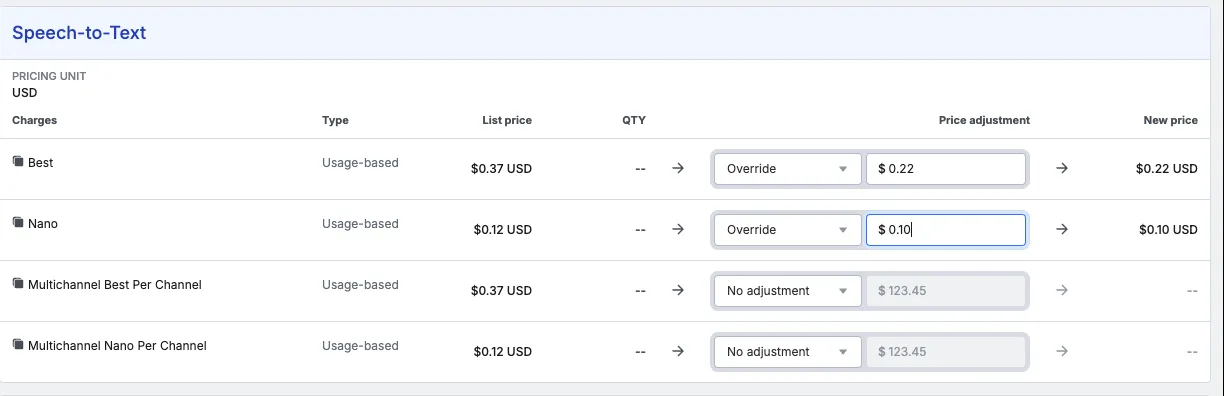
This will bring you to the Price Adjustments page. For any prices that need changing, select Override in the dropdown menu and then add in the adjusted price. Note: If adjusting prices for specific Universal models, make sure to also adjust the corresponding Multichannel Per Channel price to the same amount. Once all the prices have been adjusted, click Continue.
The following page will set up billing. The customer’s Stripe ID should already be added, but you can check the customer’s Stripe account just to verify that the ID number is correct. You can then select whether the customer should be billed automatically or via an invoice. Being billed automatically is the default and should be what is selected unless the customer is on a monthly invoicing plan. Click Continue.
You’ll then be prompted to review the plan and any custom changes made to it. If everything is correct then click Done. You will be returned back to the customer’s account page in Metronome and you should see the new plan that you’ve created listed under Contracts and Plans with a status of Active.
Changes to existing contracts
If a customer is currently on a contract and wants to remain on a contract (rather than moving to PAYG), Support is unable to make these types of changes. Tag finance/Dara and ask them to make changes to the contract. Once they confirm the change, mark the initial request with the DONE emoji (if they did not do so already).
Moving from Contract to Plan
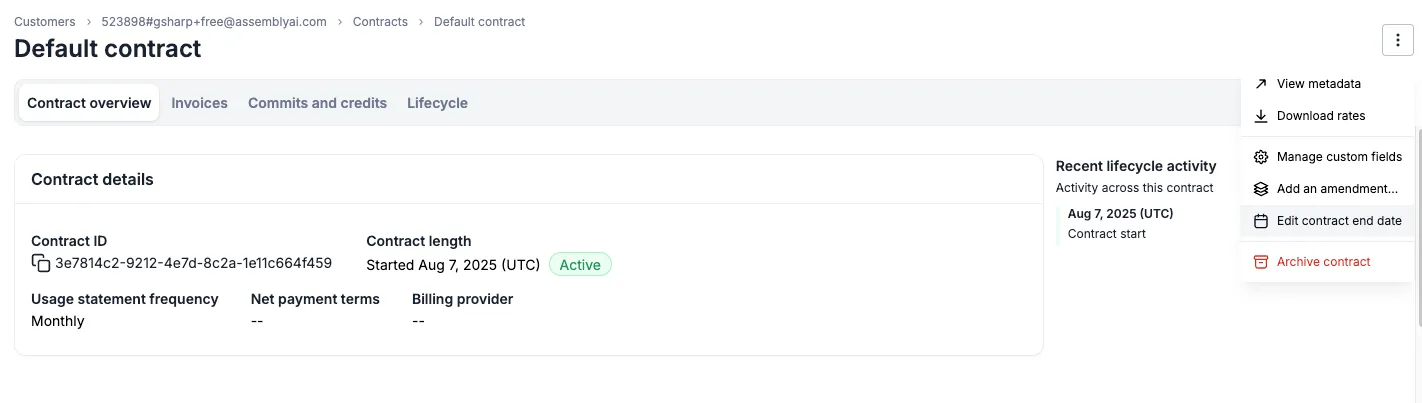
To begin, first look up the customer’s account in Metronome. Then scroll to the Contracts & Plans section.
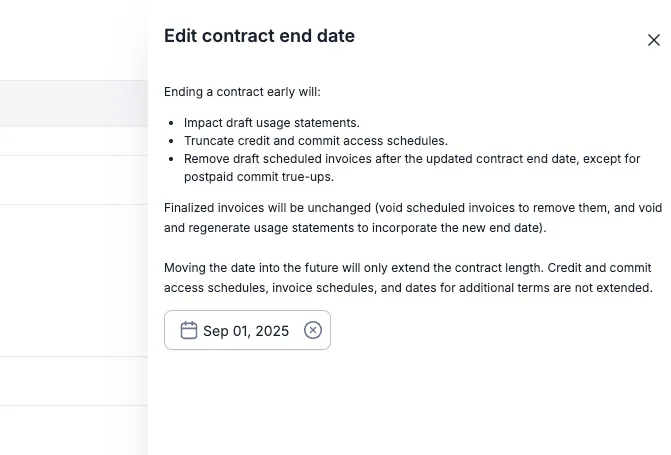
From the top-right dropdown, select Edit contract end date:
Select the end date of the contract as the day the plan begins (usually the 1st of the month). The input says “Ending before”, so this will end the contract on the selected date at 12:00AM. Then click Save.
You should now see something like this under the customer’s Contracts & plans section:

Now create a new PAYG plan according to the rates in the initial request. Make sure to start the plan on the same date the contract ends. The customer will likely be moving to a new PAYG plan (i.e. PAYG, Custom PAYG, or Growth), but if the request is ambiguous, double check with the requester. If they need the rates of their new plan to match their old contract, you will likely need to create a new Custom PAYG plan and then manually match the previous contract’s rates.
Resources
Metronome How To - For more information on how to use our billing tool.
Retool How To - For more information about how to use Retool.