
How to Send a BAA
How to Send a BAA
Sending a BAA to a customer is a relatively automated process, but there are some quirks to the Docusign UI that require a bit of manual oversight. This playbook will show you how to properly send a BAA to a customer and loop in Legal so that it can get executed as quickly as possible.
Using Salesforce
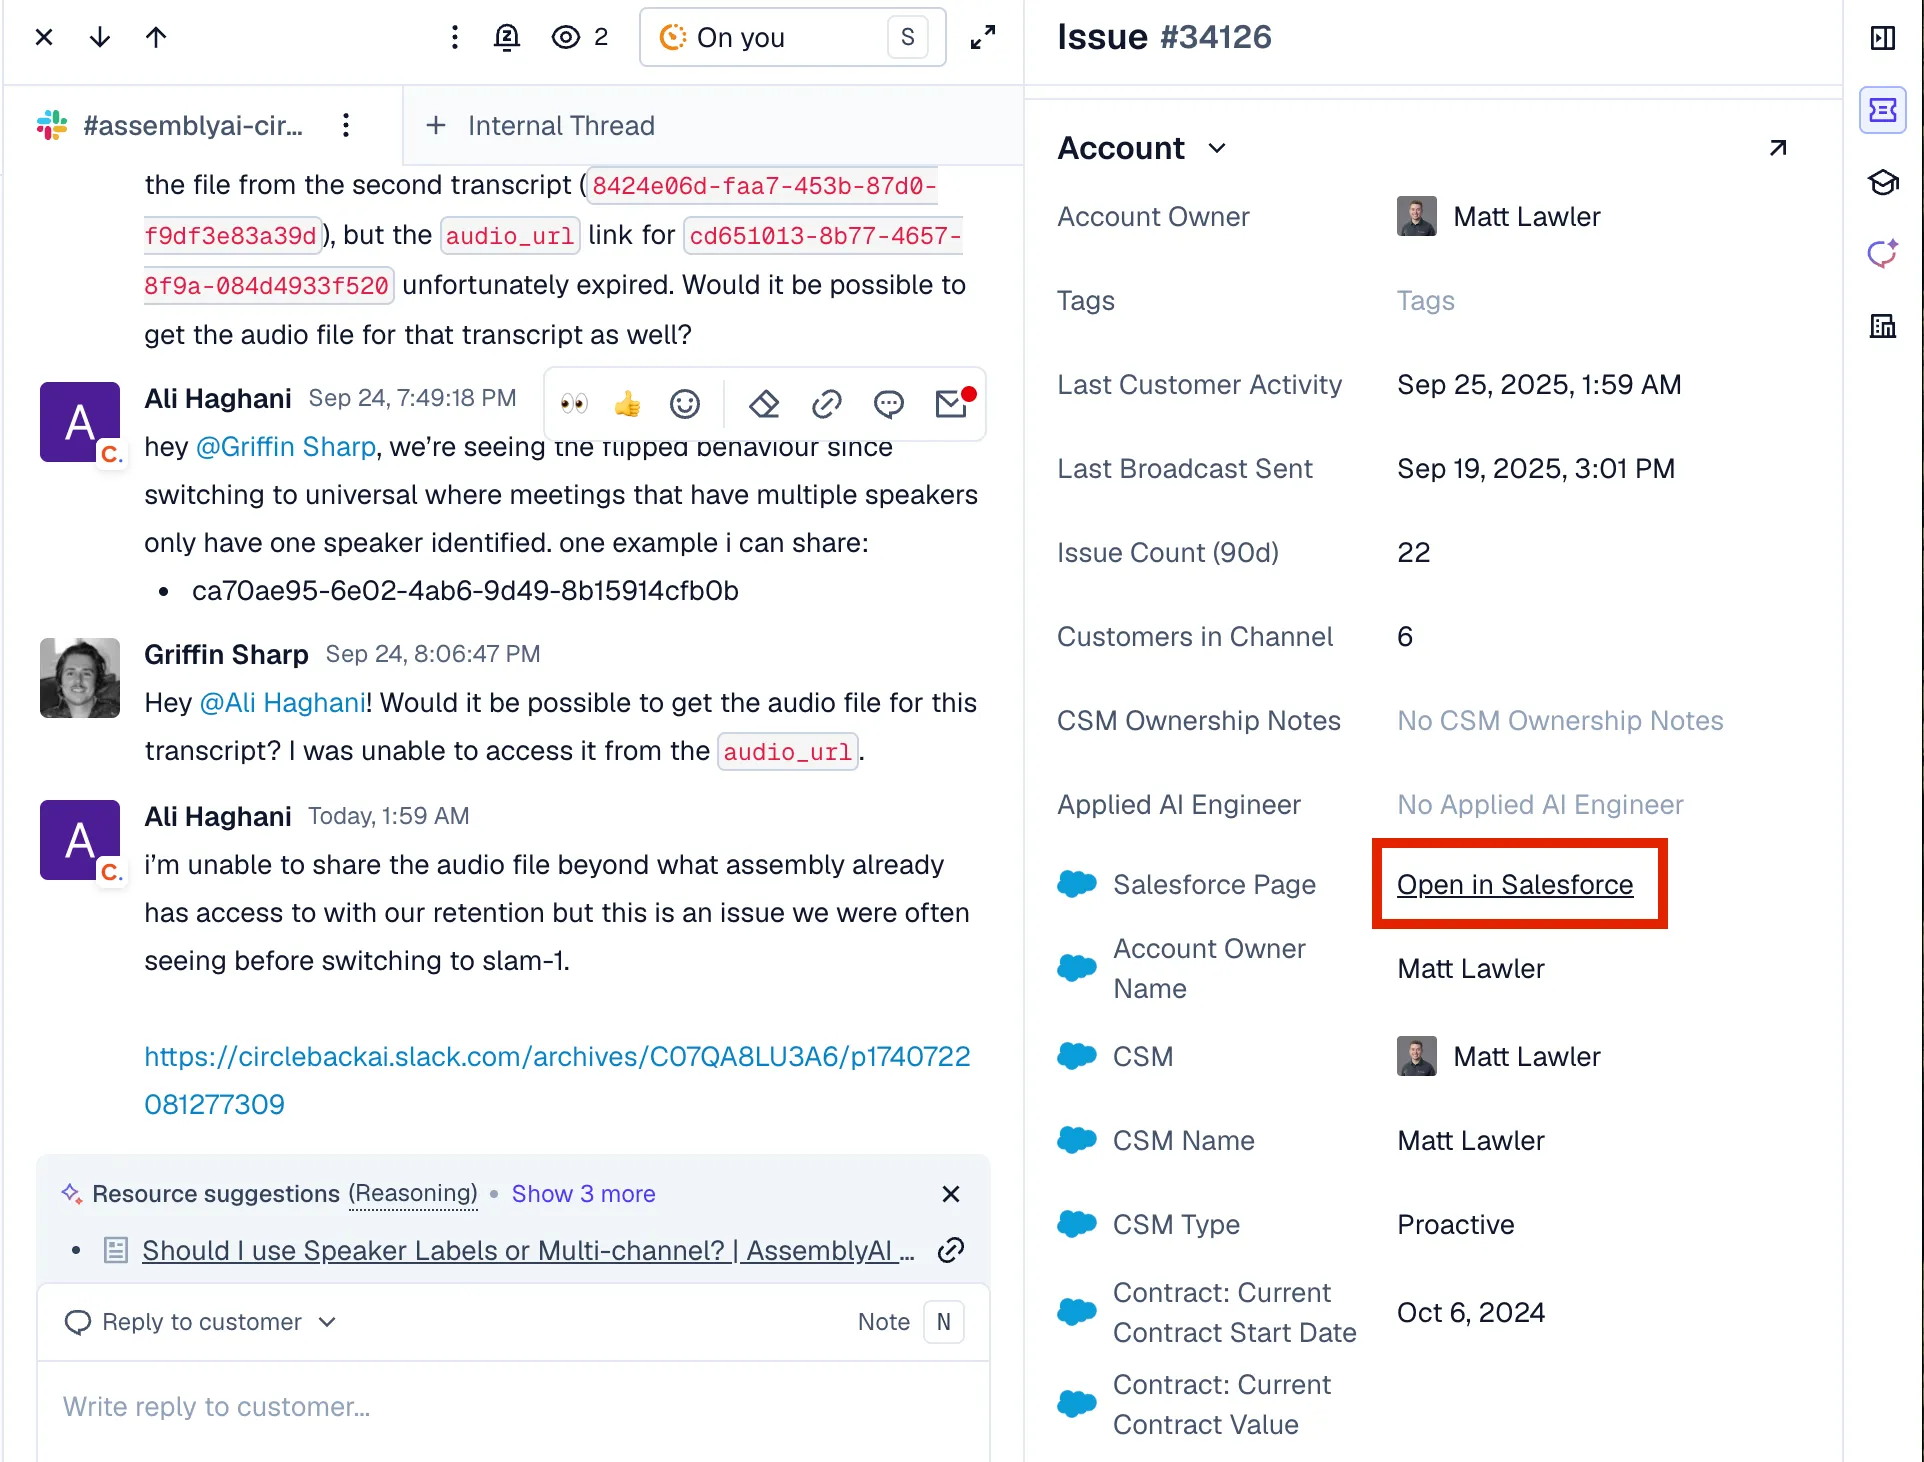
- From the ticket in Pylon, you can scroll down in the left hand side bar to the Account section and click Open In Salesforce. You can also just go straight to Salesforce and search for the appropriate account.
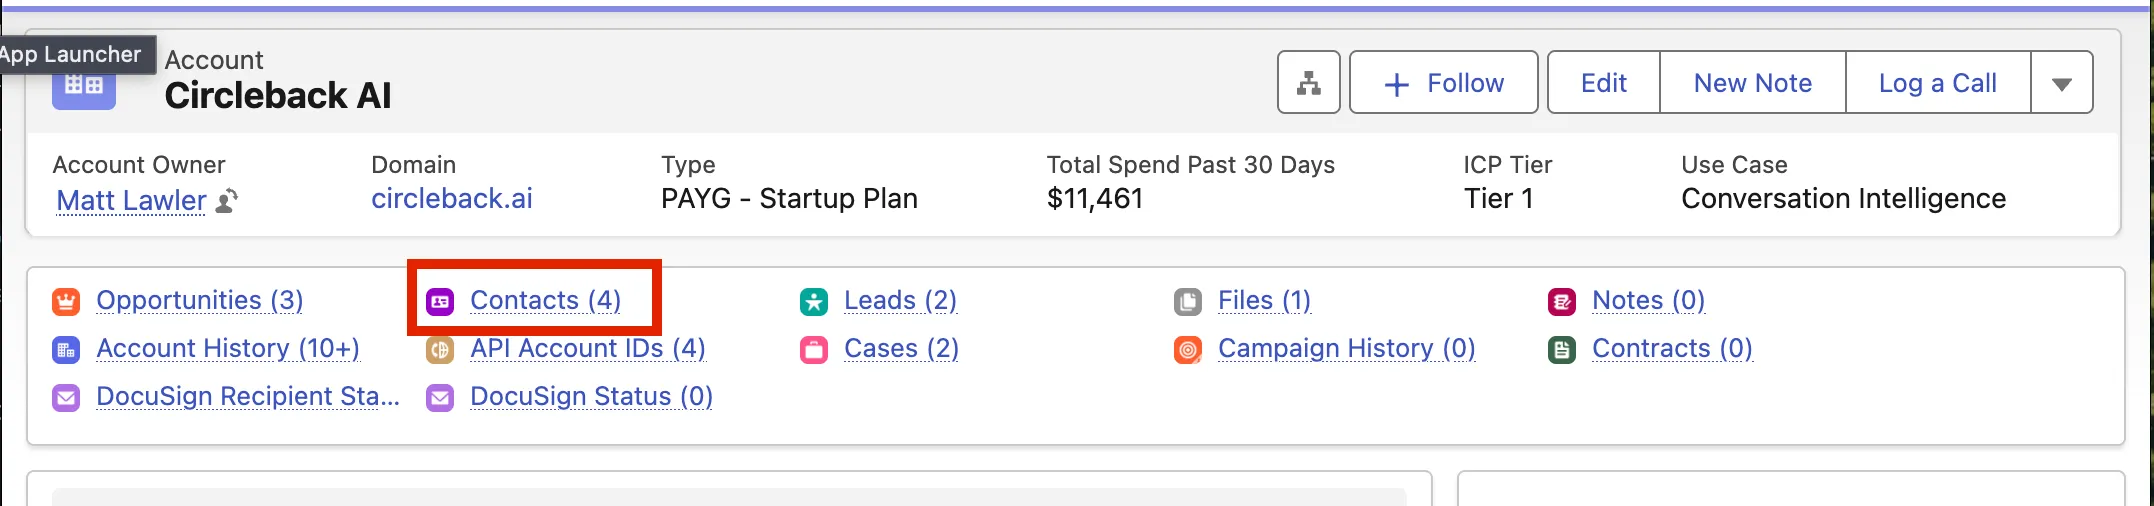
- On the account page, click on Contacts.
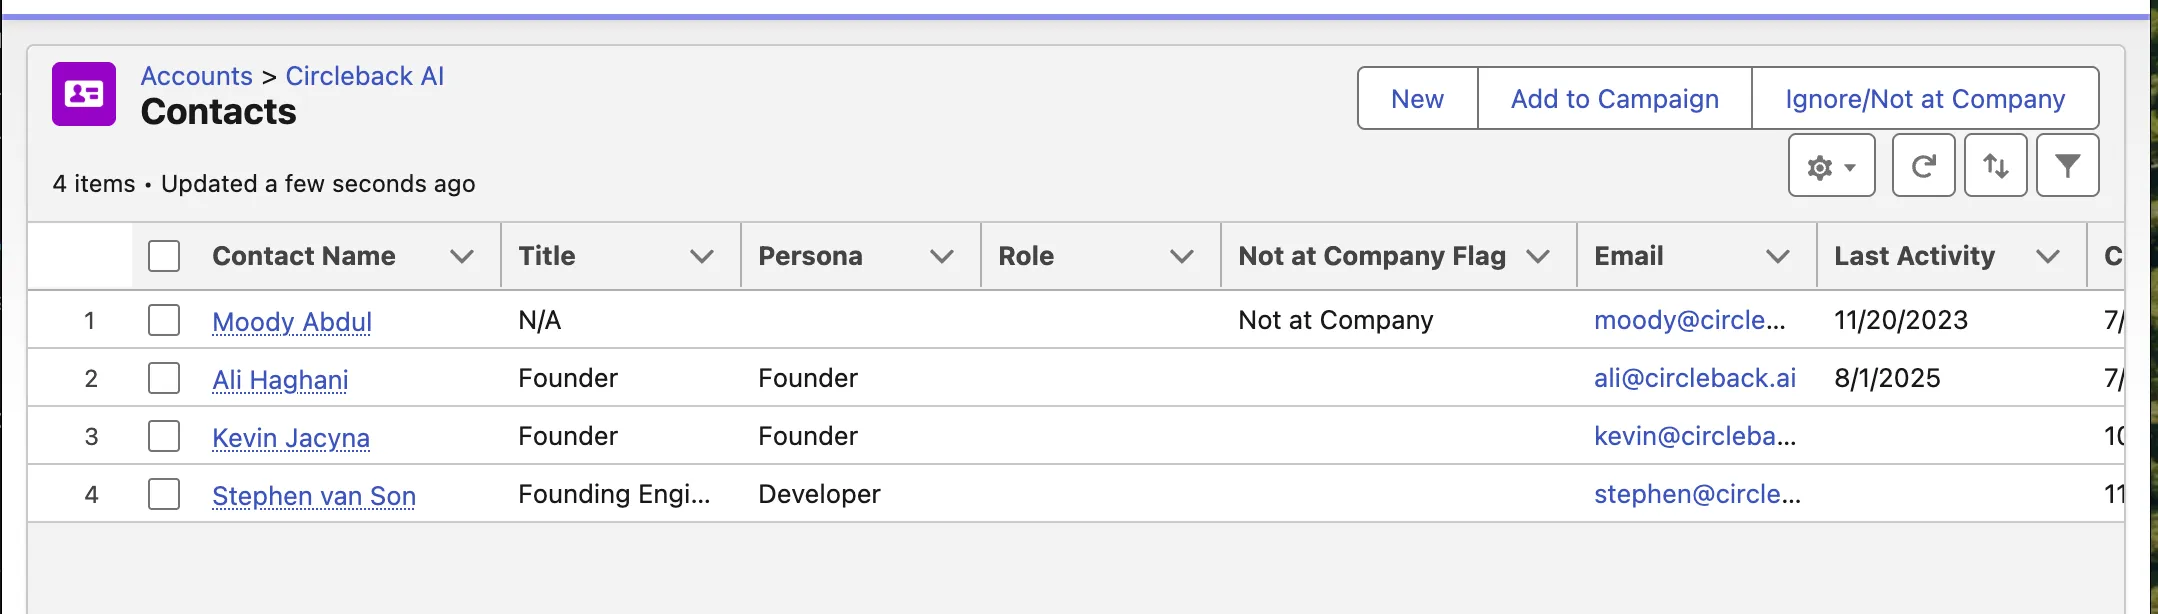
- Once in Contacts, click on the appropiate user who needs to receive the BAA. If there are no contacts listed, you can add the user’s name and email as a contact by clicking on New.
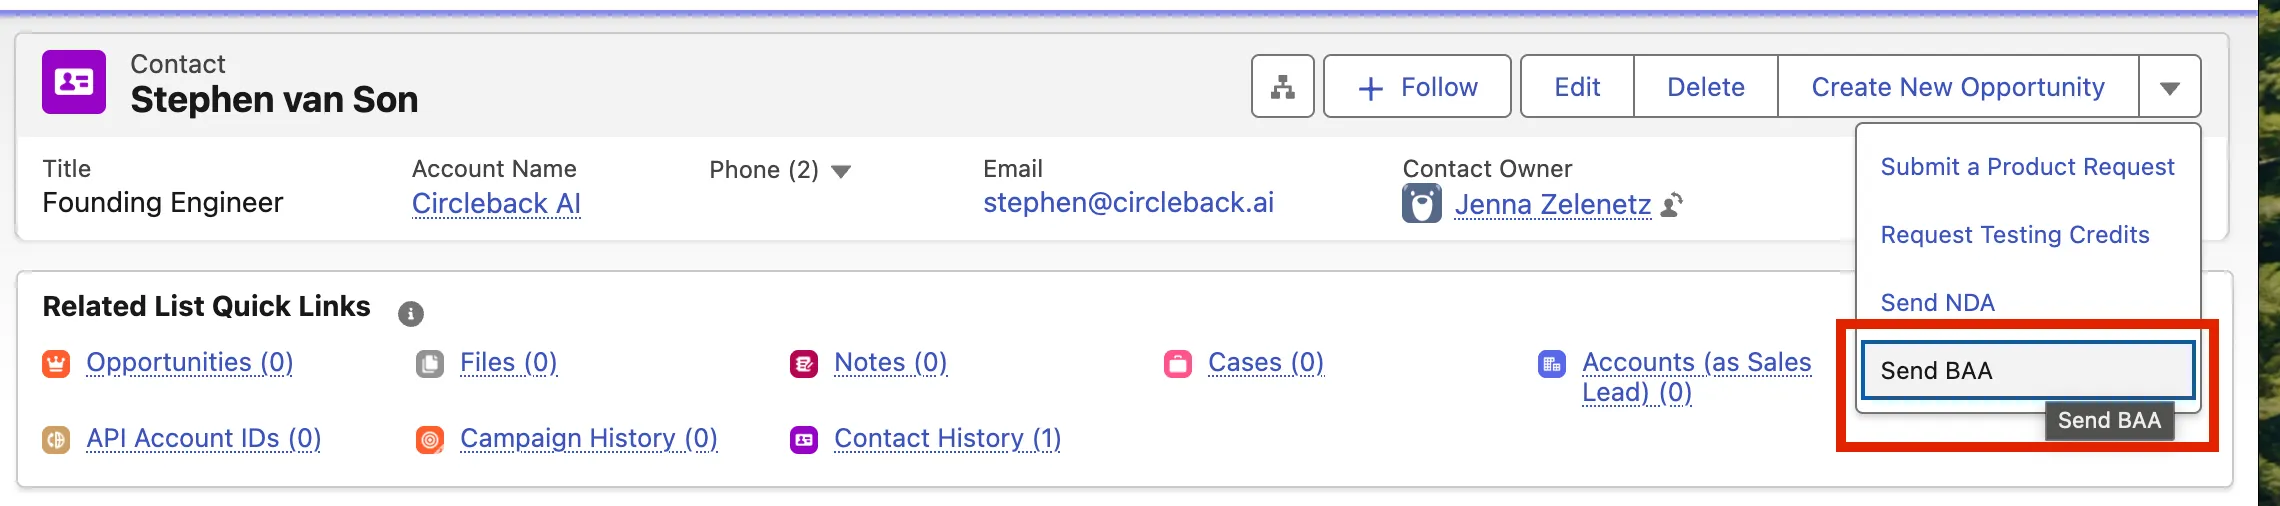
- On the specific contact’s page, click on the down arrow on the right hand side and select Send BAA.
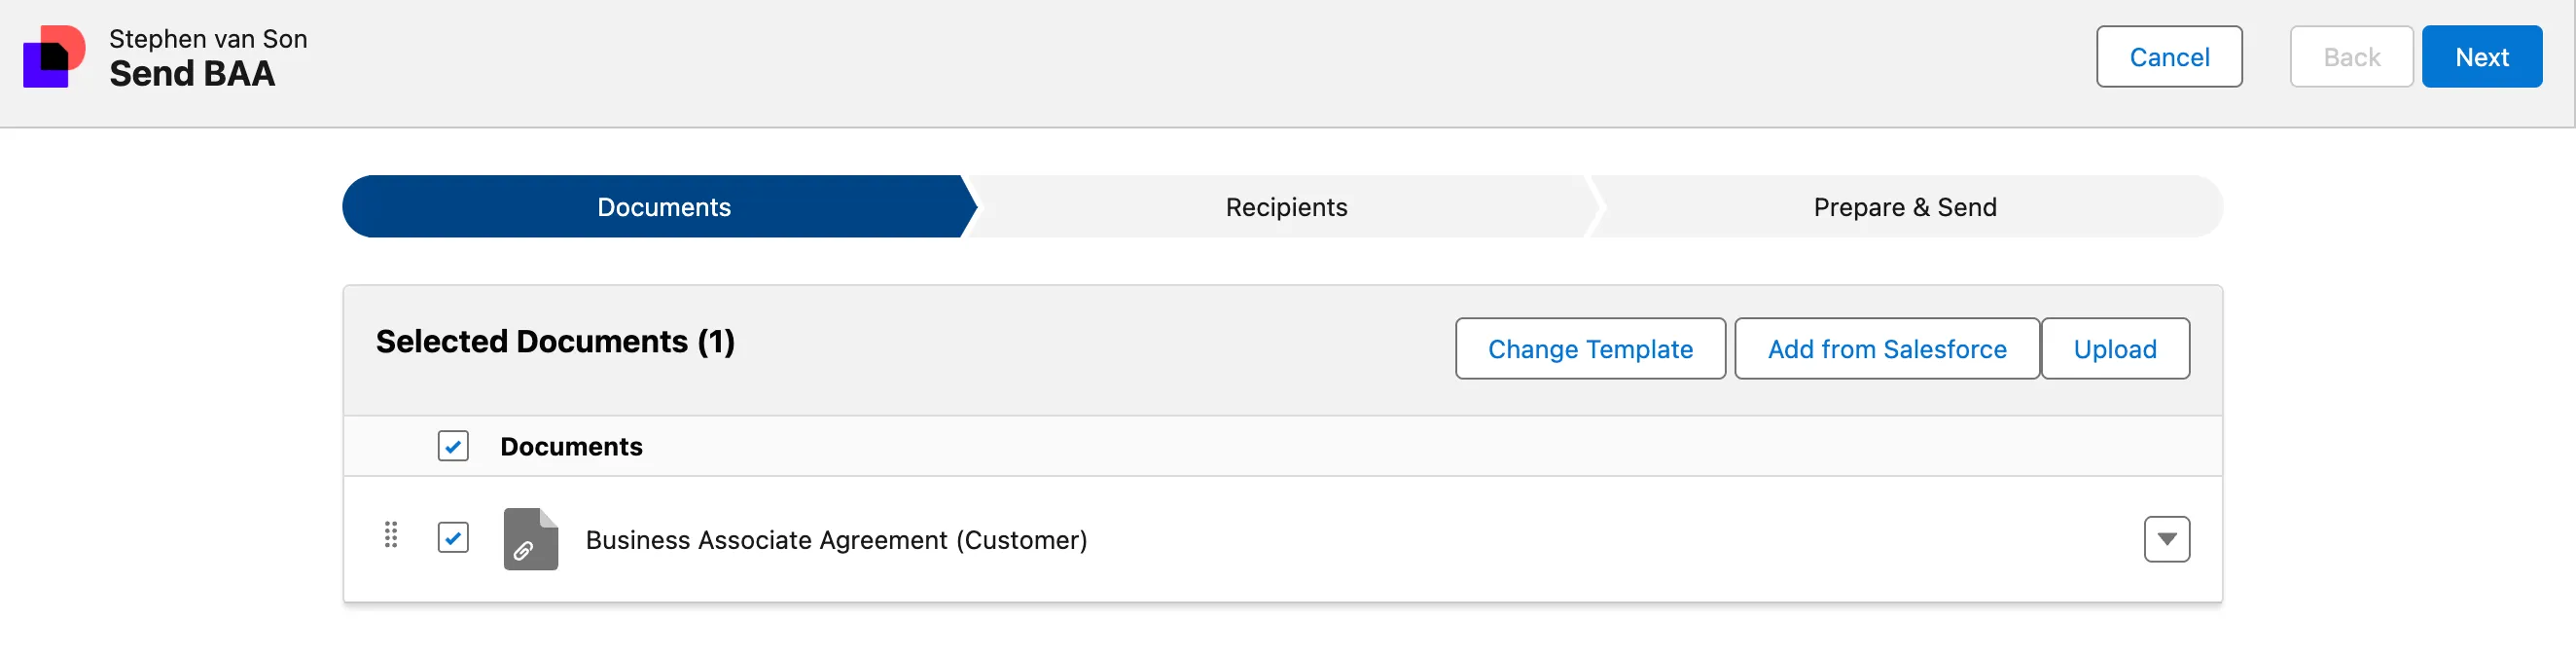
- From this point you will just need to keep selecting Next through each step until you get to the final page where you will then click Send.

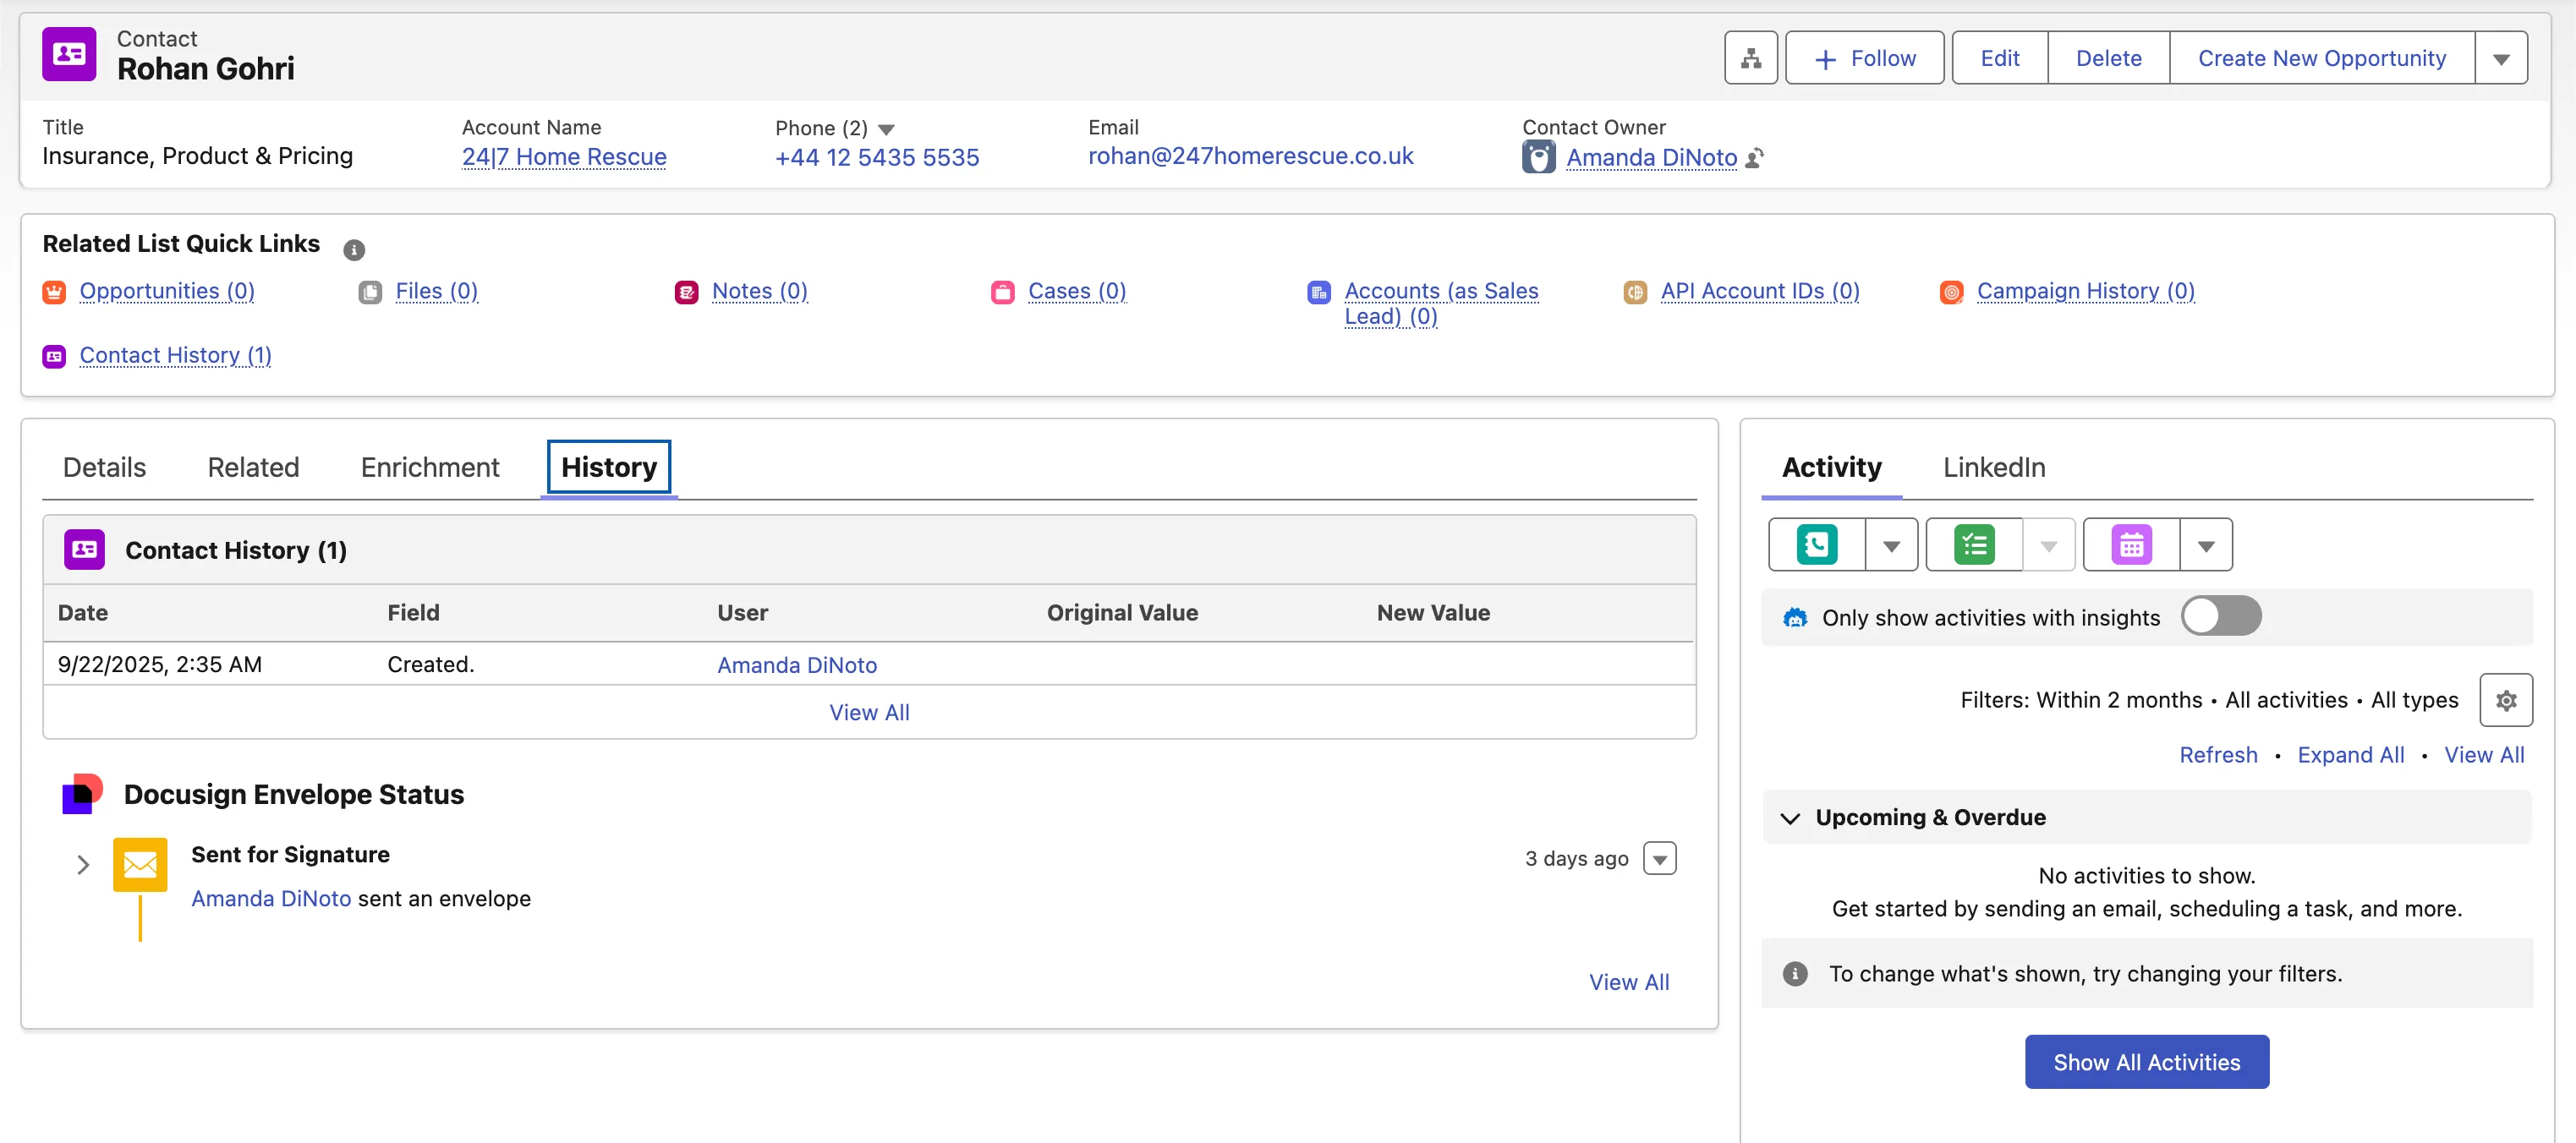
- You will recieve emails when everyone views/signs the BAA so you can stay updated on the progress. You can also track the progress in Salesforce under the History tab on the Customer’s page.
Using DocuSign
1. Use the BAA Docusign Template
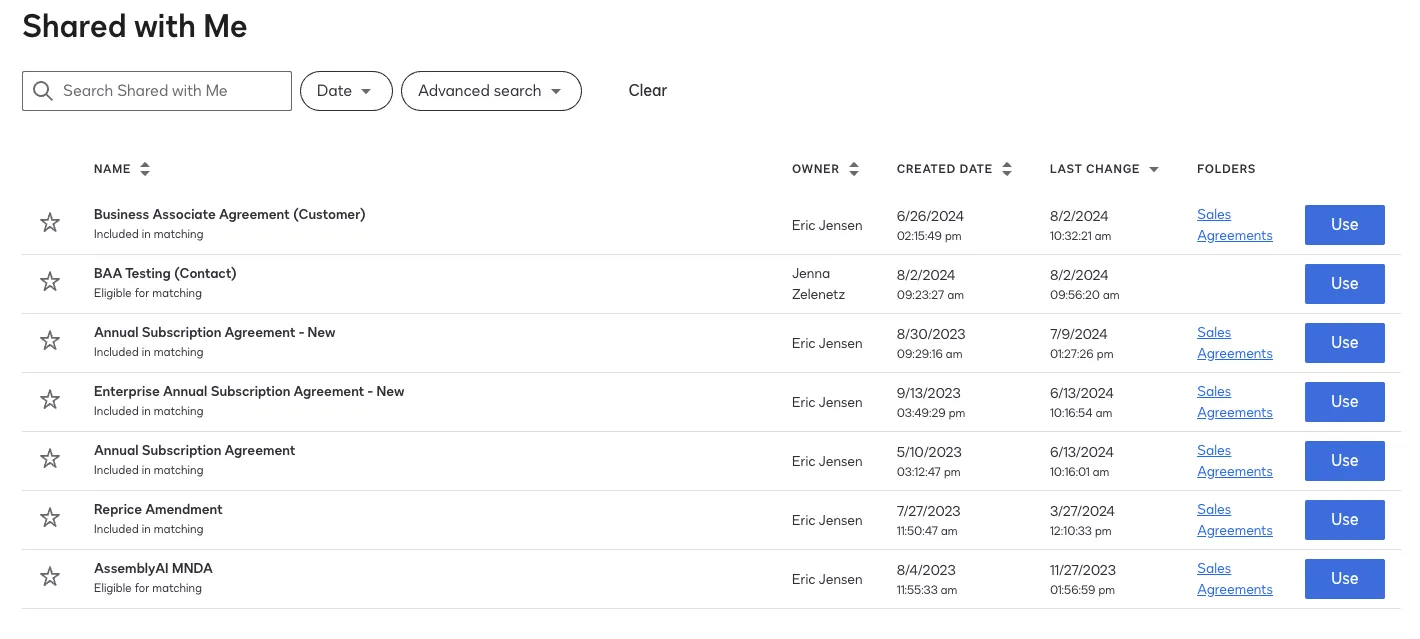
Navigate to the templates section in Docusign to view document templates for every type of agreement you can execute in Docusign. The one we’ll be using here is the “Business Associate Agreement (Customer)” template. Click “Use” next to this template to create a copy for your customer.
2. Make Advanced Edits to the Template
On the next page, you’ll see a prompt to add recipients and a message, then send the template. We want to make a few more changes before we’re immediately ready to send it, so look to the bottom of the page and select “Advanced Edit.” You should see your UI change to what’s below:
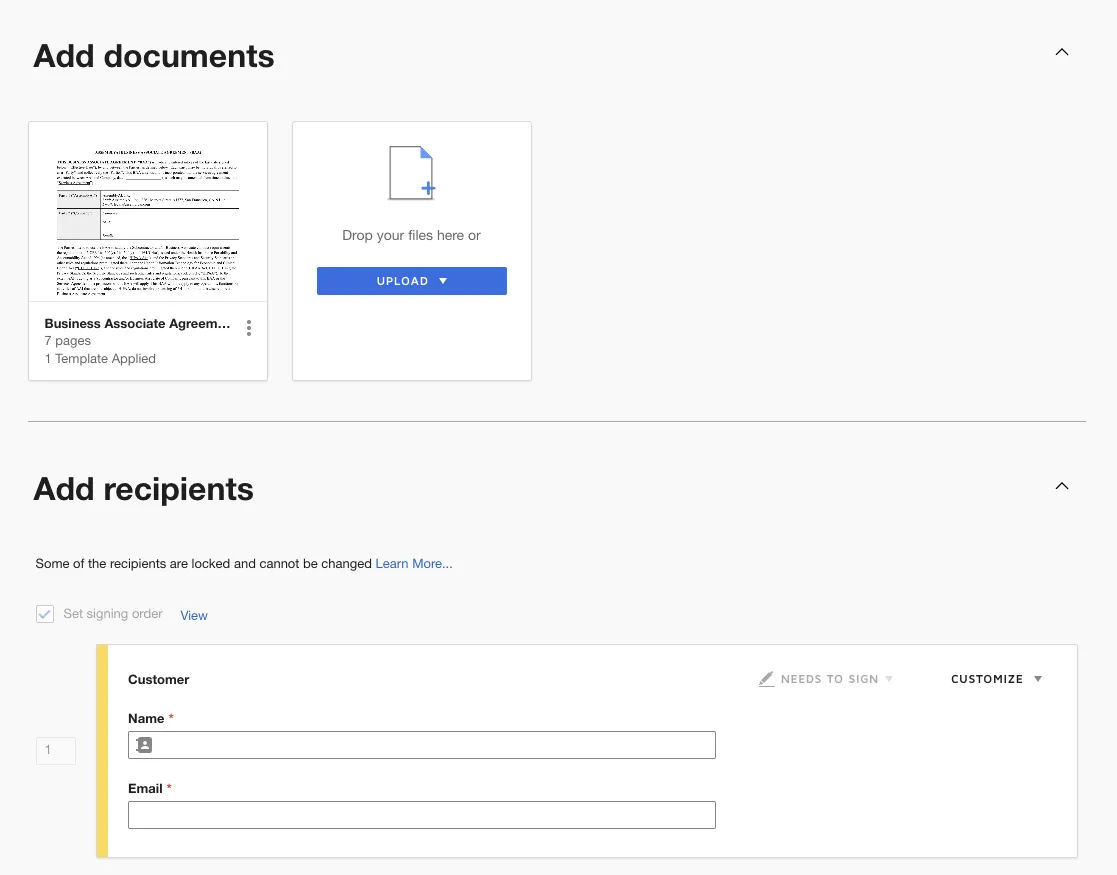
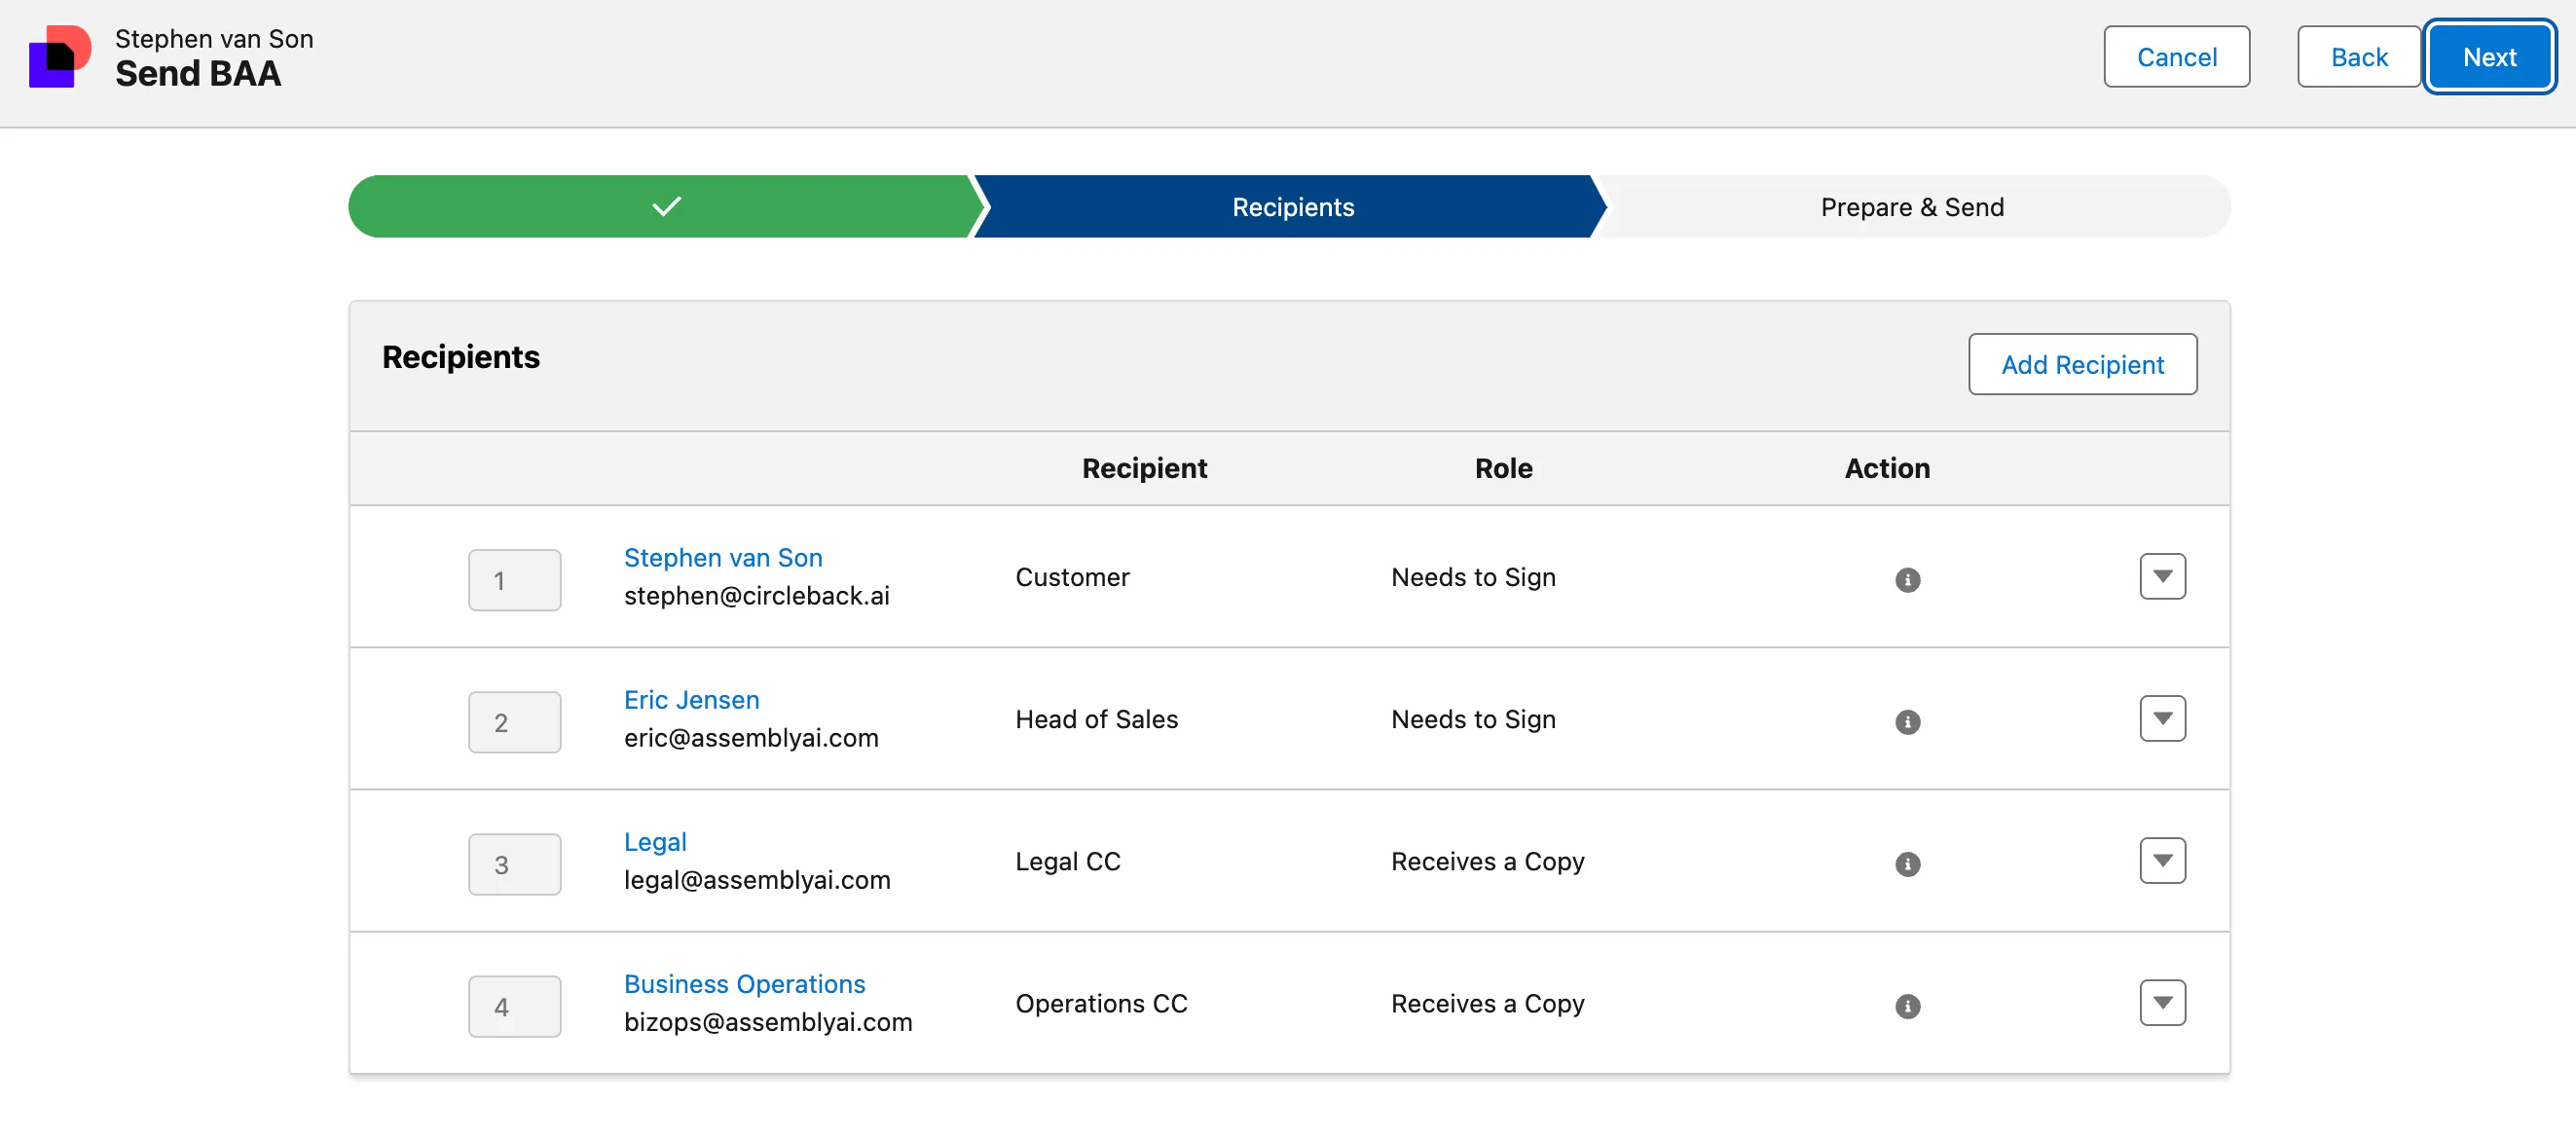
Here you’ll want to add the customer’s name and email address as the first recipient. This gives them a chance to review and redline the document before Legal gets pinged about needing to sign the document. The customer should always be the first recipient.
The 2nd and 3rd recipients, Dan and the Legal alias, respectively, should remain unchanged.
Scroll to the bottom of the page and change the Email Subject and Email Message to whatever you would like. Typically you can leave the Email Message as the default, but for easier tracking, you can update the Email Subject to “AssemblyAI // [Customer/Company Name] - Business Associate Agreement.”
Then click “Next” in the bottom-right corner.
3. Verify the Template is Correct
Now you can view the document in its entirety with the placeholders for each signatory. Verify that the customer is responsible for the following sections (you are not required to fill any of them out, even if it’s possible to do so):
-
Page 1
-
Date Signed
-
Party 2 (“Company”) Section:
-
Company Name
-
Mailing Address
-
Email
-
-
-
Page 7
-
Company Name
-
Signature
-
Signatory Name
-
Signatory Title
-
Date Signed
-
Also verify that Legal/Dan has placeholders for the following on Page 7:
-
Signature
-
Full Name
-
Title
-
Date Signed
If these placeholders are all correctly displayed, you can press “Send” in the bottom-right corner and email the document off.
4. Tracking the BAA Process
Now that you’ve sent the document to the customer, how do you verify that it’s been completed? Head to the “Agreements” tab in Docusign to do this.
For any BAA that you’ve sent, you can find them under the “Sent” tab on the left sidebar. The current “Status” for the document will show who it’s been sent to, and who still needs to sign. You can also void a document, delete it, or modify it here.
